The Domain Name System (DNS) is the hierarchical and decentralized naming system that identifies computers reachable through the Internet or other Internet Protocol networks. (Source: Wikipedia DNS). So it is essential to use the fastest possible service to get the best results.
#1. Getting the Comcast DNS IPs
Comcast DNS IPs are free to use for Xfinity / Comcast customers
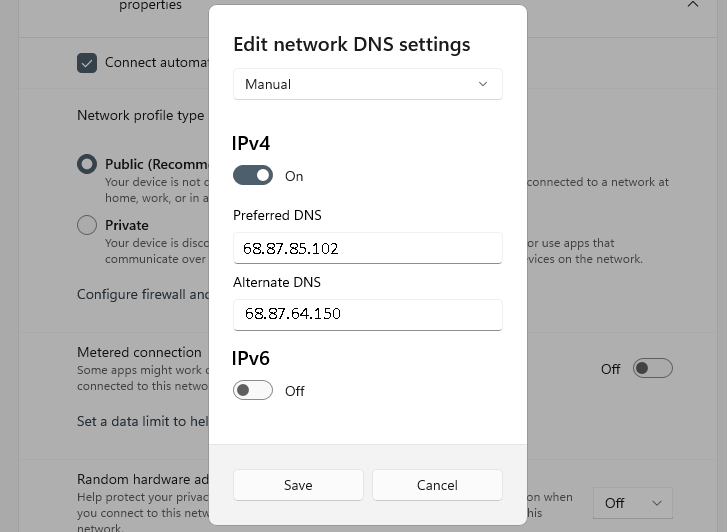
68.87.85.102 and 68.87.64.150
#2. Steps to edit network DNS settings of Windows 11
- From your Windows 11 taskbar – right click on the WiFi icon
- Click on the small pop-up menu Network and Internet settings
- A new window will open – Network and Internet settings – click on the Properties box there
- A little below that page, find the Edit button for DNS server assignment and click on it.
- Edit Network DNS settings will open
- Click on the drop-down option, and select Manual & then IPv4
- A DNS editor window will open as shown below. Enter Comcast DNS IPs there
- Click Save to set your DNS server settings.
You have successfully configured your network DNS to Xfinity DNS!
Alternative DNS solutions:
Google DNS Configuration for Windows 11
Conclusion
We have covered the steps required to configure your Windows 11 to Xfinity DNS IPs. Setting your ISP DNS servers like this will improve your internet browsing experience with faster response time overall.
More advanced guides on DNS settings: https://developers.google.com/speed/public-dns/docs/using