Installing a Virtual Machine Operating system is time-consuming if one has to enter all details step by step when prompted by the installer. Sometimes, it can take hours to complete the OS installation because the prompts might be coming in the middle of the installation, one after the other. Thankfully, the VirtualBox 7th version release has a feature to install VMs with prefilled information provided at the beginning and automatically take care of the OS installation.
This guide will cover Unattended Linux Ubuntu VM installation and automatic VirtualBox Guest addition package installation for Ubuntu 22.04 Desktop on VirtualBox 7.
Step #1 Environment setup & Downloads
I used Windows 11 with all the latest updates and VirtualBox version 7.0 version (VirtualBox-7.0.2-xxxxx-Win.exe ) for my Virtualization platform, so it supports Unattended installation. The newest version of Ubuntu Desktop 22.04 LTS for the Linux Desktop Operating System was also downloaded. Please go ahead and download VirtualBox and Ubuntu if you haven’t already. The currently available version might be slightly different than the one I used here, so providing the link to the main download pages:
- Oracle VM VirtualBox version 7 – Download link: https://www.virtualbox.org/wiki/Downloads
- Ubuntu 22.04 Desktop AMD64 download link: https://ubuntu.com/download/desktop
- Host Operating system: Windows11 Version 22H2 x64
Once you have downloaded and installed VirtualBox 7, please proceed to step #2.
Step #2 Configure your Ubuntu Linux VM on VirtualBox 7
OpenVirtualBox 7 interface and create a New VM. It is pretty straightforward. Make sure to keep the “Skip Unattended Installation” checkbox unchecked for the unattended installation experience.
- Enter Name – This will be the VM name, not your Linux hostname
- Select Folder: where your VM files are stored on the host machine
- Navigate to ISO Image: point this to the ISO image file you have downloaded from the Ubuntu website
- VirtualBox would auto-detect the OS Type and Version, as shown below
- Keep the Skip Unattended installation checkbox unchecked.

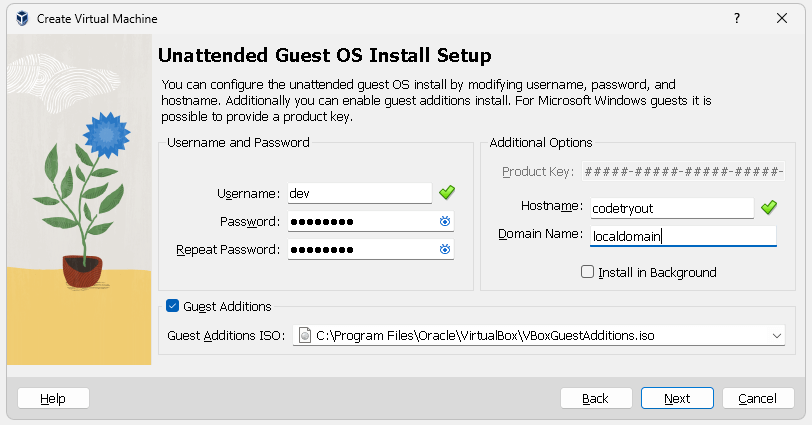
Step #3 Unattended installation & Auto install Guest Additions
To continue with the unattended installation step, you must provide a few more details, such as:
- OS username
- Password
- hostname
- domain name.
This information will be used to input the OS installation prompt – automatically!
Check the checkbox “Guest Additions” to automatically install VBox guest additions.
Step #4 Enabling copy-pastes between VirtualBox Host and Guest VM
In earlier versions of VirtualBox VMs, Guest Additions package installation was an additional – manual – step, and the user had to go through several steps to make it work. Here are some examples:
- VBox Guest Additions for Ubuntu 22.04 VM (for VirtualBox 6.x)
- How to enable copy-pastes between VirtualBox host and Ubuntu VM (VirtualBox 6.x )
However, the current VBox automated this step as an option. You would have to enable the copy-paste and drag/drop from the VirtualBox interface later.
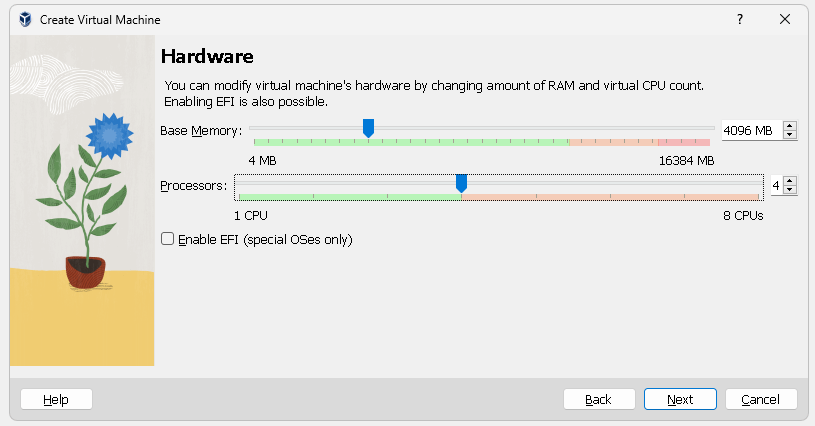
Step #5 Hardware Configuration
Now, choose your VM RAM (Base Memory) and Processors.
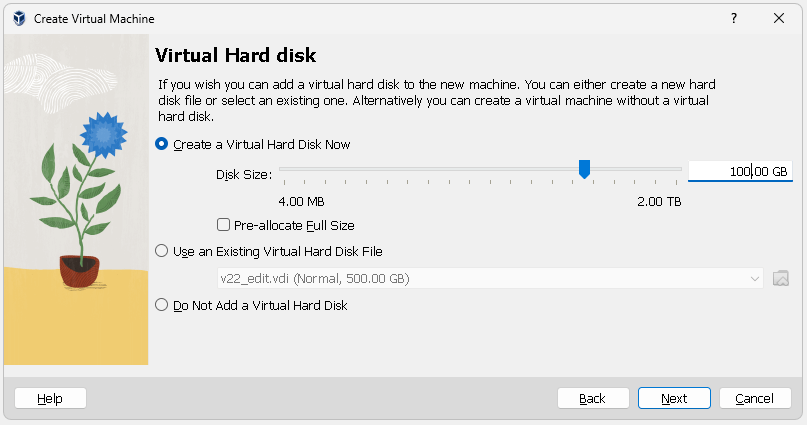
Then, select Virtual Hard Disk. The amount of memory is virtually allocated if you keep the checkbox “Pre-allocate Full Size” unchecked. There might be a slight performance issue if you keep it unchecked. However, it will help not pre-occupy the host machine’s storage space.
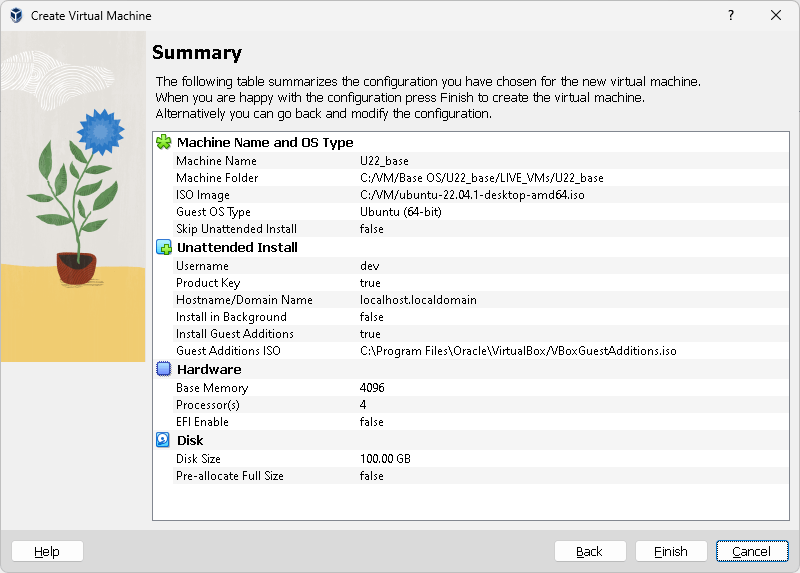
Summary of VM configuration
Advantages of VBox unattended installation
I found there are several advantages of going with the unattended feature of VirtualBox, such as:
- Installation time-saving – In my case, the initial VM configuration took less than 5 minutes. VirtualBox performed all OS installation interactive steps automatically!
- Installing VirtualBox Guest additions automatically. – With the automated guest addition feature, again, it is time-saving for new and advanced Linux/VirtualBox users alike.
Conclusion
This guide has covered all the required steps to create a Ubuntu Linux VM using the VirtualBox 7 unattended installation method and automated Guest Additions installation.
FAQ
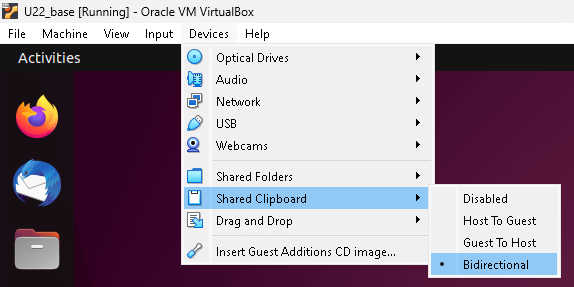
How to enable copy-paste and drag-drop between VirtualBox VM and host?
If you have installed the guest-addition packages, as shown above, you should be able to enable copy/paste shared clipboard and drag/drop from the Guest VM’s VirtualBox menu interface as shown here:
Related articles: