Running an Ubuntu Linux Virtual Machine (VM) on a Mac benefits developers who need a consistent Linux development environment, compatibility testing across different operating systems, and learning Linux commands. It also allows users to access Linux-only software, simulate server environments, and provide security through isolation. Resource allocation, cross-platform development, and open-source contributions are additional advantages. Popular virtualization software like VirtualBox or VMware Fusion can be used to set up and manage these VMs on a Mac.
How to Run a Linux VM on Mac M1 / M2?
This guide will walk you through configuring a Linux Ubuntu VM on M1/M2 Mac computers. To be precise, we will cover all the steps to customize your first Linux VM to run quickly.
Here are the steps at a high level before you start.
- Install the Virtualization platform, UTM
- Get an ARM-supported OS iso
- Configure a Linux VM on M1/M2 mac (Install Ubuntu VM on Mac M1/M2)
- Getting started with UTM
- Choose Virtualization option
- Choosing the OS flavour
- Linux VM Configuration
- Hardware customization – Memory & CPU
- Storage size settings
- Shared Directory
- Configuration Summary
- Start the OS installation
- Running the Ubuntu installer
Step #1 Install a Virtualization platform
Software Virtualization has two primary components:
- Host Machine, in our case, this is your m1 / m2-based macOS
- Guest Machine, also called Virtual Machine or VM – in our case, is Ubuntu Linux.
The virtualization platform facilitates the guest OS, a Virtual environment. We use UTM, so you can run a complete sandbox environment inside your Virtual Machine without impacting other files on your host-machine base OS.
We have chosen UTM for ARM-based macOS since it is an Open source and a free solution. (Other platforms are available, such as Parallels and VMware Fusion).
To start with:
- Download the free version of UTM virtualization software for your Apple silicon
- Install the UTM app on your macOS.
If you are using the UTM App on Mac for the first time, I would recommend you to go to this article first:
Comprehensive guide to setup UTM on M1/M2 macOS
Step #2 Get an ARM-supported OS iso
You would require an ARM-supported Linux Operating system to run Linux on M1/M2-based Mac.
Ubuntu and many other OS currently support arm architecture, and we will use Ubuntu in this guide.
Step #3 Configuring a Linux VM on M1/M2 Mac
VM config step #1 Getting started with UTM
Firstly, Open your UTM app and open a new VM creation menu (the plus symbol)
As mentioned before, please refer to this complete guide on UTM if required. Here is a preview of what the UTM Virtual Machine app console looks like:
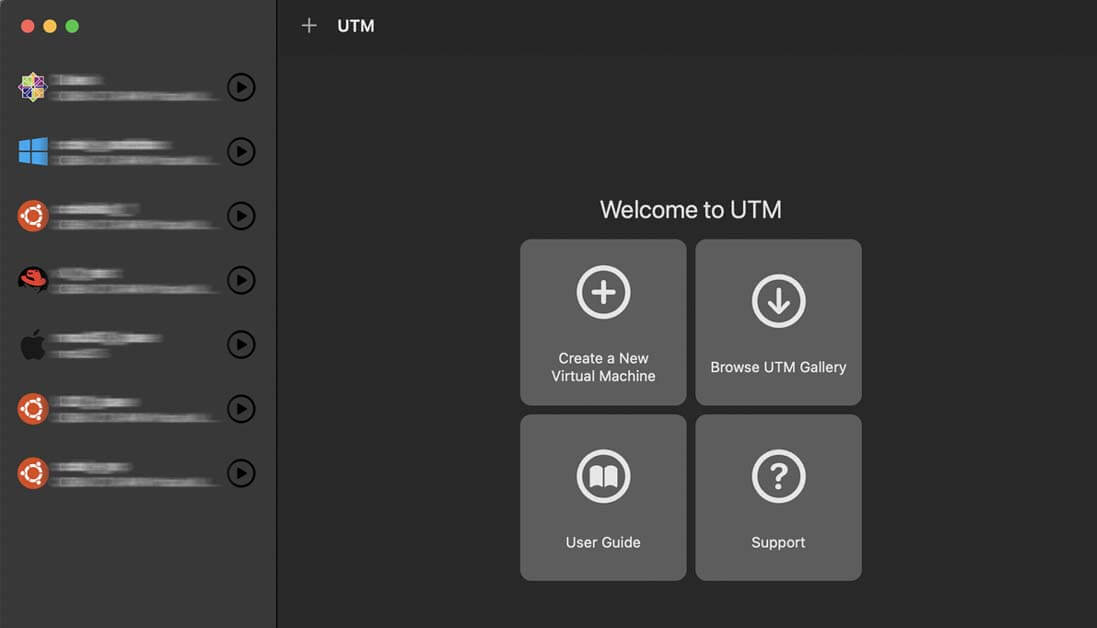
UTM Virtualization on m1 Mac
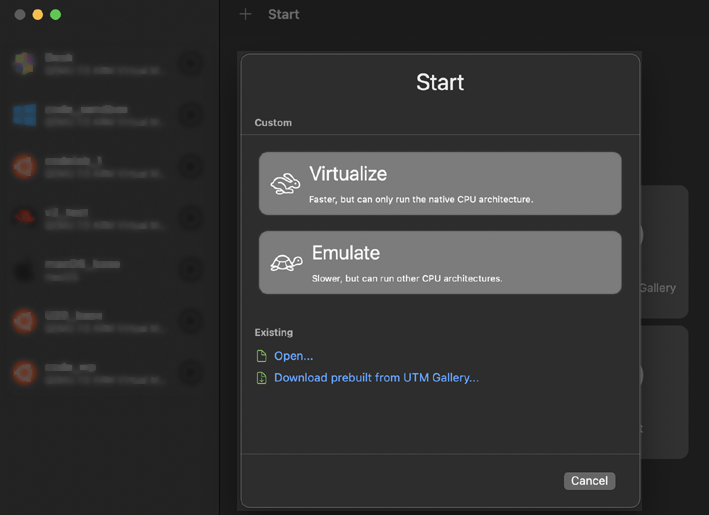
VM config step #2 Choose the Virtualization option
Open a New VM customization menu and select the Virtualize option.
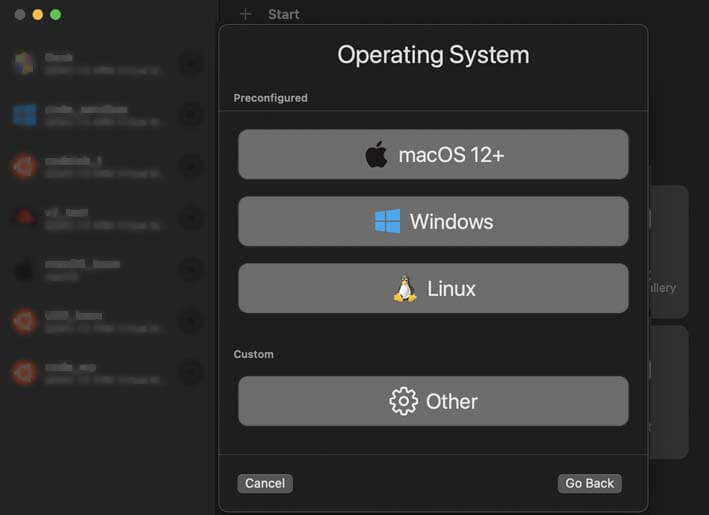
VM config step #3Choosing the OS flavour
Under the Operating System selection, select Linux since we will be using Ubuntu Linux as our guest OS.
VM config step #4 Linux VM Configuration
From here on, you will get an advanced Linux VM customization menu.
From the first page, map your Ubuntu iso file, as shown below.
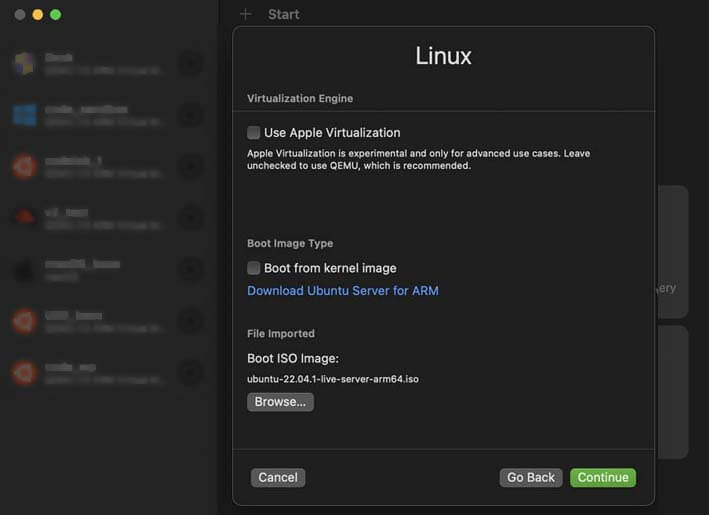
You can download the latest version of Ubuntu ARM isos from the official pages, and links are given below.
- Ubuntu 22.04 ARM download
- Ubuntu 20.04.5 LTS (Focal Fossa) ARM download – Desktop and server versions are available.
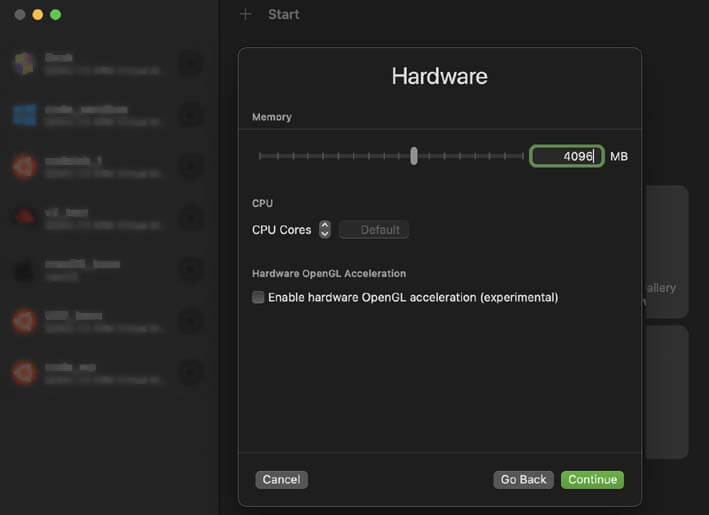
VM config step #5 Hardware customization – Memory & CPU
Memory – Under Hardware, you can set the RAM – Memory. I recommend leaving it at the default value (4096 or 4GB).
CPU Selection – again, do not change this unless you are aware of the performance issue to your host OS if you add more virtual CPUs to the guest.
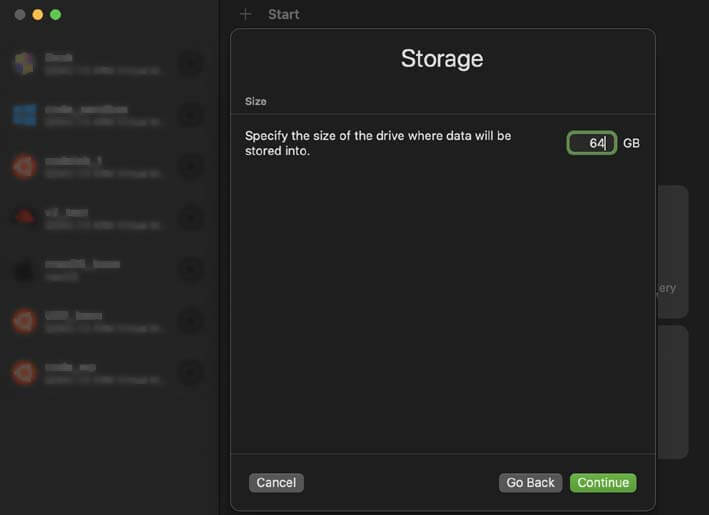
VM config step #6 Storage size settings
I saw the default value is set to 64GB. If this is not suitable for you, you may change it. Please note that your host machine disk will occupy the space you allocate here.
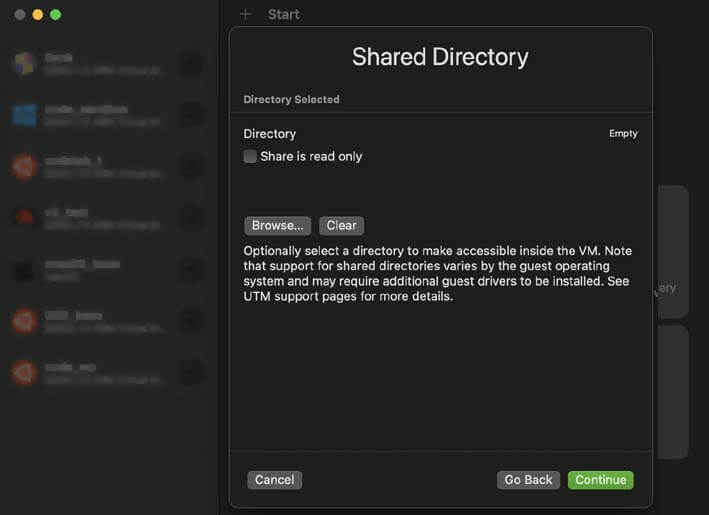
VM config step #7 Shared Directory
UTM provides a feature to share your MacOS directory with the Linux Guest. I did not use this feature here in this guide for simplicity.
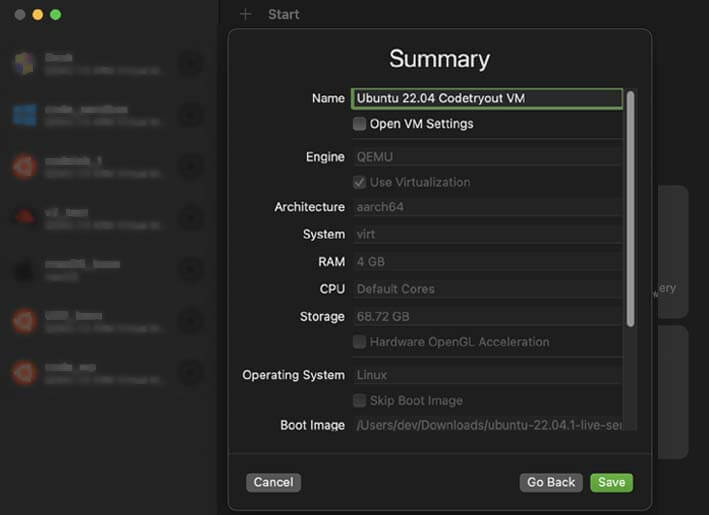
VM config step #8 Configuration Summary
Finally, you will get a summarized view of your advanced VM configurations. You may edit it here, or a few options would be editable even after creating the VM.
VM config step #9 Start the OS installation
Your Virtual Machine hardware is ready with this step. You may change the settings or start the installation.
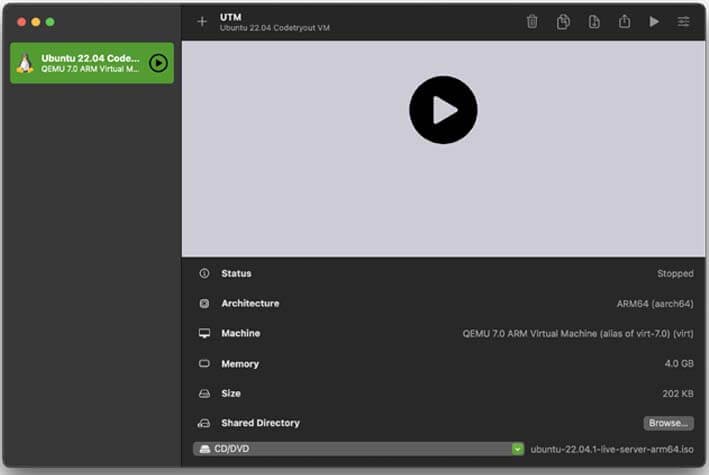
VM config step #10 Running the Ubuntu installer
When you are ready to start the OS installation, click the play button, and your OS installation menu will appear, just like installing an OS on a physical computer.
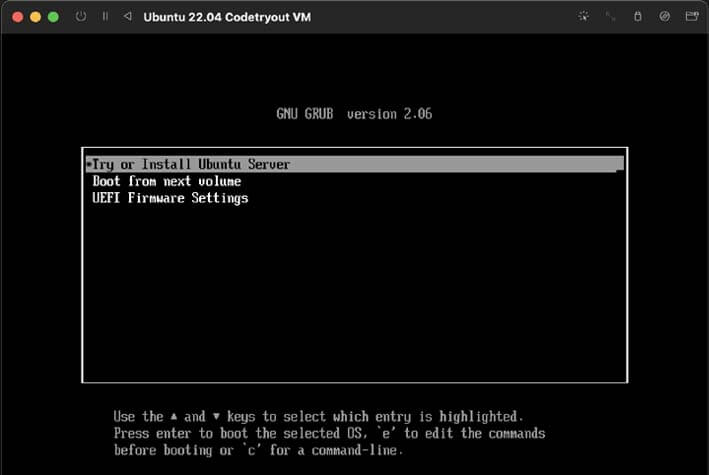
To complete the Ubuntu installation step, follow the OS installation menu options. If you are unsure of your changes, I recommend you choose the default options the install Wizard provides.
FAQ: Can I change the VM hardware setting after the OS installation
Yes! When the VM is in the stopped state, you can change most of ( not all ) the VM configurations after the Guest OS iinstallation.
Related articles:
- VirtualBox for Apple m1, How to run VMs on M1 or M2 Macs
- How to install Chrome on Ubuntu Linux
- How to install Ubuntu on VirtualBox ( x86 intel/AMD version)
Conclusion
This how-to guide has covered all the steps required to run an Ubuntu Virtual Machine on macOS m1/m2 ARM architecture using UTM Virtualization. My experiment used a MacBook Pro M2, with 16GB Memory and 512GB SSD. The Ubuntu VM performance is excellent. Good luck with your new Virtual Machine development environment!