In this guide, we will walk through the setup of a complete Virtualization platform for Apple M1/M2-based MacBooks called UTM. Switching from an Intel x86 processor to an Apple SoC is fascinating because m1/m2 computing can bring in significant speed ( that is my experience). However, all software is not ready to switch to the ARM platform yet (as of 2022), which sometimes leads us to deep research on how to make it work!
When I moved on as a full-time user of the M2 MacBook Pro, my first challenge was the unavailability of the Oracle VirtualBox ARM version.
Why choose UTM for m1/m2 mac virtualization?
I did a lot of research, tried VMWare Fusion for mac and Parallels, and finally chose UTM. The main reason is that UTM software and its dependencies are all free and open-source. I am a heavy user of Virtual Machines, and now on an M2-based Mac, UTM was the perfect solution for my continuous VM usage. Here is a list of points I noticed after a few months of trying out UTM on a Macbook.
- UTM UI is very close to Oracle VirtualBox’s User interface.
- The UI is intuitive and customizable, and for the guest VMs, menu panels and editors, all are minimal and practical.
- It works very fast, just like VirtualBox VMs. I did not notice any glitches in Macbook M1/M2.
- Pausing and starting running from the pause state of VMs take 2-5 seconds!
- No additional software/middleware installations are required, such as VBox guest additions, which are necessary in the case of VirtualBox.
- Configuring networking and other computing settings is easy as well.
- Mouse moving in and out of VMs has no problems, and changing screen resolutions is also easy.
- Almost all possible Computing customizations are available in UTM VMs. I have tried out several changes in RAM, CPU, Disk, Networking, interfaces and so on without facing any challenges.
- You can create a variety of Virtual Machines on UTM-
- Linux generic (CentOS, RHEL, Fedora)
- Ubuntu ARM (I tested Ubuntu 20.04 and Ubuntu 22.04)
- Other Debian distros
- macOS
- Windows 11 ARM (preview editions are available to download from Microsoft )
- Any OS platform of ARM64 or even intel/AMDx86 works on UTM. However, I could see the ARM64 provides the best performance.
- From the UTM website, I could see that 30+ processors supported by QEMU, including x86_64, ARM64, and RISC-V are all supported by UTM virtualization on MacOS.
- Finally, it works perfectly on the M2 Macbook Pro (I couldn’t see a reason not to get similar performance on Macbook Air, M1/M2).
How to install UTM Virtualization on M1/M2 mac
This guide’s prerequisites are having an m1/m2-based Apple computer, UTM software, ARM-based OS images and a high-speed internet connection.
M1/M2 Macbook Pro or MacBook Air
I assume you have an M1/M2 processor-based Macbook Air or Macbook Pro with you to continue with this setup. Although the steps given here are exclusive to ARM processors, some steps overlap with UTM setup for intel-based MacOS.
UTM Virtualisation software.
UTM virtualization platform is free and OpenSource. You have two options to get it for your MacBook Air (or MacBook Pro).
- Get the free version from UTM’s official download page: https://mac.getutm.app/
- Get it from your Mac app store, which is not free.
I have used the free version of UTM, which is available to download from the UTM website. No special attention was required to get an Ubuntu VM running. Just download and install it like any other MacOS app.
How to create a VM on UTM
This is a straightforward procedure if you have decided which Virtual Machine Guest OS you want to run. I recommend you run Ubuntu 22.04 or older versions of Ubuntu for the first time and gain familiarity with the UTM app. Make sure that you are downloading the ARM version of the Operating system. Ubuntu 22.04 ARM and Ubuntu 20.04 ARM are available to download from here:
- Ubuntu 22.04 ARM download
- Ubuntu 20.04.5 LTS (Focal Fossa) ARM download – Desktop & Server versions are available.
Let’s quickly go through the steps to create your first m1 Virtual Machine
Step #1 Running your VM host with UTM app.
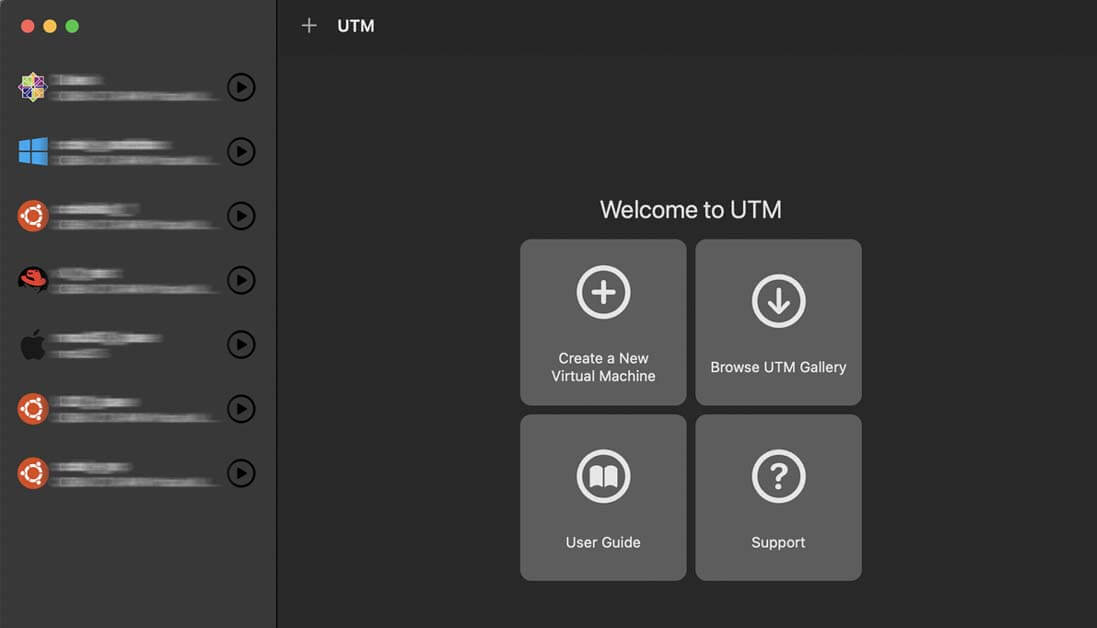
Open your UTM app, and here is what it looks like.
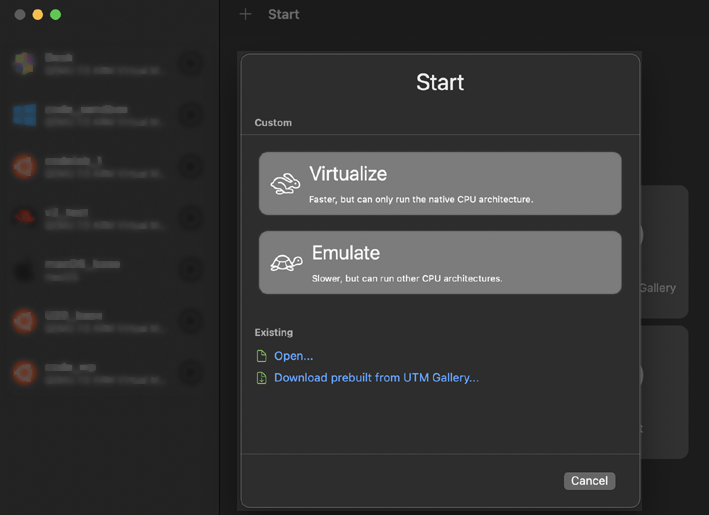
Step #2 Selecting Full Virtualize or VM emulation
Click Create a New Virtual Machine and in the Start menu customization – select Virtualize
You have an option to emulate if you want to run a non-ARM-based OS. In my experiment of running Ubuntu amd64, it was running very slow.
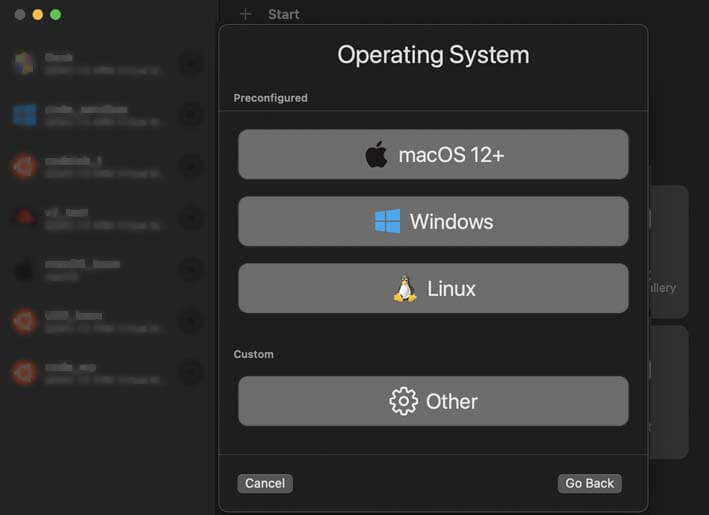
Step #3 Selecting the Operating System
Following option selection, choose your Guest Operating System. In my case, while installing Ubuntu 22.04 VM, I selected Linux.
Continue with the customization steps and select the default options unless you want to modify the number of Virtual CPU cores, the RAM allocation or the disk space.
Complete the VM settings, and map the CD drive to the OS ISO image you have downloaded.
Step #4 Installing the guest OS on the UTM VM.
There is no difference in the OS installation steps, and you can follow the OS installation steps depending on the distro you have chosen and the OS type, such as Server or Desktop. In my experience, the VM installation was faster than that of intel based laptop.
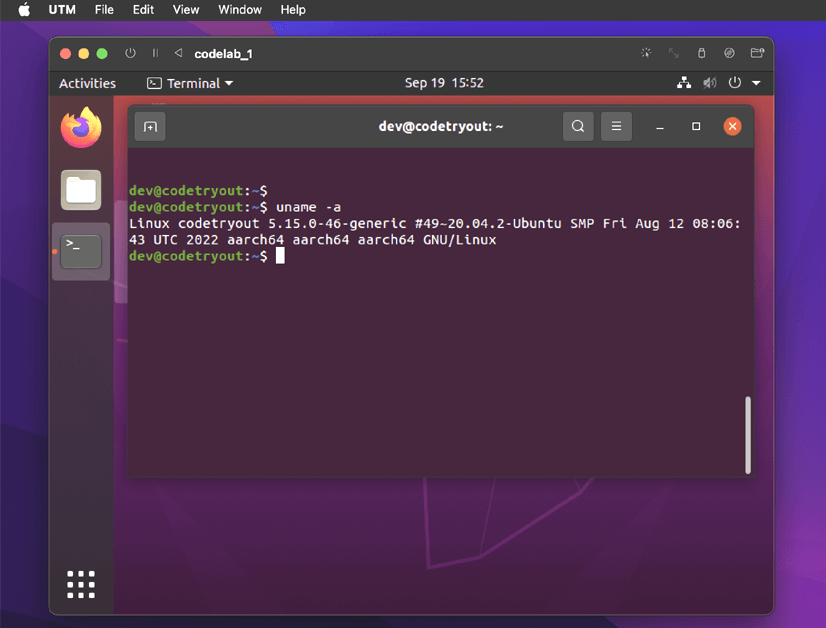
You are running your first VM on an M1 processor!
UTM surprised me with its speed. VMs start within seconds and I couldn’t find any flaws except that copy-pastes of files and folders are not working (at least I couldn’t find the way to make it work like by installing guest additions in VirtualBox). Copying text between guest VM and host mac is working without any issues.
Experiments of installing Guest Operating systems on m1/m2 mac with UTM.
I have tried several guest OSs on my macOS UTM Virtual host, without facing any issues. Here is the complete list:
- Ubuntu:- 22.04 ARM, 20.04 ARM – (Ubuntu ARM Download: https://ubuntu.com/download/server/arm )
- CentOS7 ARM32 (armhfp)
- CentOS7 ARM64 (aarch64)
- macOS ( mac-os-9.2.1 – this is a pre-built UTM VM )
- Windows – yet to experiment with this, however, there is a comprehensive guide available for this here: Windows 11 ARM Guide & Download
Should you use UTM on Mac or VirtualBox on Windows?
If you want to be a MacBook ARM user, UTM provides the best free Virtualization solution available at the moment, as VirtualBox does not support ARM. There are certain limitations, primarily because of the non-availability of ARM-based software, which is not only limited to the ARM OS architecture but extends to all software inside the OS, such as all docker images are not ARM friendly yet. Dropbox does not support ARM64-based Ubuntu, and so on. Many popular software and tools actively support ARM64, such as Google Chrome and Firefox.
VirtualBox has been here for a long time, supports a more significant number of Guest OSs, and has some additional features that UTM does not have.
So, it depends on your development environment and how you want it to be set up. Provided you have a choice of selecting between the two! which is not the case if you are configuring it in your company-provided device, MacBook or laptop.
FAQs
Do you have any questions or require help in setting up Virtual Machines in Apple Silicon SoCs? (Apple Silicon) Please feel to ask. [ Ask a question ]
Conclusion
This tutorial is an alternative solution by setting up UTM, instead of VirtualBox on m1/m2 macOS. I hope this is helpful for you in setting up your virtual environment on your m1/m2 Apple devices.
Oracle recently announced (October 2022) the support of VirtualBox on ARM architecture (beta release). We will soon try out it and come back with the optimum steps.